
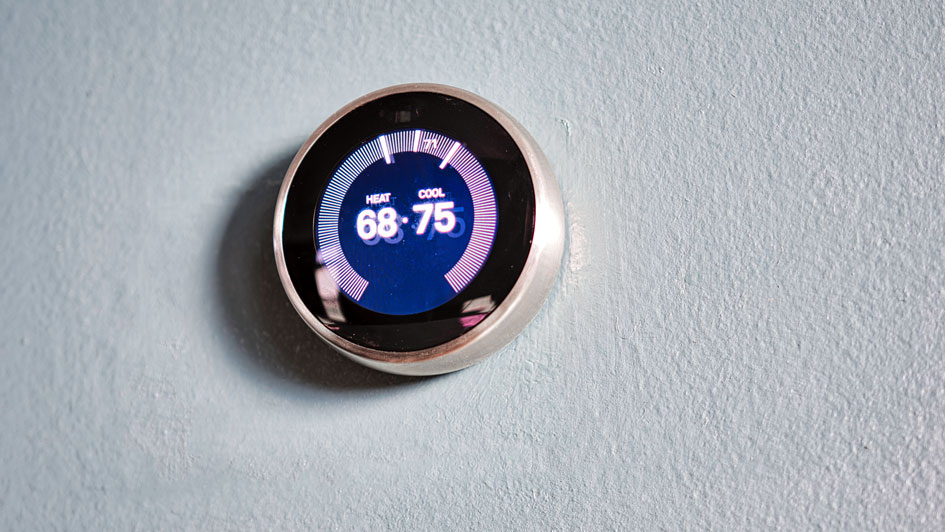
A Nest Thermostat is a great investment for keeping your home comfortable, no matter what the season or weather. With a number of innovative features meant to maximize efficiency, convenience and comfort, a Nest Thermostat is an excellent choice to help you manage your energy use — saving you money in the process.
That’s why more people are looking to add devices like a Nest to their homes. If you're interested in trying a Nest yourself, call your nearest expert for smart thermostat installation in Reinholds.
From auto scheduling to energy efficiency monitoring, Nest helps make controlling the climate of your home effortless.
Ready to learn more? Take a look at 12 things you need to know about your Nest Thermostat.
1. How to Reset a Nest Thermostat
The first thing to know about resetting a Google Nest Thermostat is the difference between a restart and a reset.
- Restart: Similar to restarting any electronic device, including your phone or computer, restarting your Nest Thermostat turns it off before starting it right back up again. This maintains all your settings and is a step to take if your Nest is frozen or not connecting to Wi-Fi.
- Reset: A reset erases some or all of your settings. For the most part, homeowners will perform a reset as they're moving into a new house and bringing the thermostat with them, or if they are moving out and want to erase any personal details from the Nest before leaving it behind for the next resident.
If you want to perform a reset, it helps to record existing temperature settings so they're still available if you forget or erase them. Next, locate Settings -> Equipment and record your system wires, heating type and safety temperature settings.
Once you have recorded your preferences, go to Settings, select Reset and press. You can choose from five options:
- Restart: Turns your Nest off and reboots it while saving your settings. Another way to restart is to press the outside of the Nest and hold it down for a few seconds until it goes black, and then pull your hand away.
- Schedule: This type of reset clears all scheduling information—including for your hot water, if that has been connected to your Nest. By choosing this kind of reset, you’ll be given the chance to plan out a new schedule or wait while your Nest learns your schedule.
- Away: An Away reset removes anything your Nest has learned about how often you walk by, so it will be able to change the temperature even when you're not around.
- Network: If you select this reset option, it will remove all your network information and your Nest will no longer be connected to Wi-Fi. Use this option if you want your Nest to forget your Wi-Fi password.
- All Settings: The most far-reaching option, using the All Settings reset option removes all your personal settings and learning.
2. How to Connect Nest Thermostat to Wi-Fi
A stable internet connection is important to getting the most out of your Nest.
To connect your Nest to the internet:
- Open the Quick View menu by turning the thermostat ring.
- Find the Settings icon.
- Select Network.
- Once your Nest has scanned nearby networks, locate your Wi-Fi and, if needed, put in your password.
3. Does a Nest Thermostat Use a Battery and How Long Does It Last?
Nest thermostats receive power from your HVAC system, but they also include a rechargeable lithium-ion battery for backup in case of a power outage. According to Google, who manufactures the thermostat, a Nest Thermostat battery will generally last several months. It can be recharged using a USB charger that comes with the Nest.
4. Shutting Off a Nest Thermostat
If you plan on being away for a couple weeks, it's a good idea to set your Nest Thermostat to Off mode, though Eco mode is also a good option. The Off mode option deactivates your regular heating and cooling schedules, but it will still adhere to any current Safety Temperatures to keep your home from getting particularly hot or cold.
To select Off mode on the thermostat:
- Hold the touch bar until the display reads “Turn Off” and then slide the bar to highlight Turn Off, and then touch the bar to select.
- You can also go to Mode from the main menu and select Off.
Off mode can even be accessed from your Google Home app:
- Select Thermostat from home screen
- Tap Temperature mode
- Select Off
5. Will Alexa Work with a Nest Thermostat?
Yes, your Amazon Alexa can be used to control a Nest Thermostat. Alexa can also be integrated with with Nest doorbells and cameras. And of course, you can use Google Assistant to control your Nest.
6. Will My Nest Thermostat Function Without Wi-Fi?
In short, yes. Your Nest Thermostat can still control temperatures even without Wi-Fi. That being said, a lack of an internet connection means your Nest doesn’t have the smart thermostat functions that most people enjoy.
7. Are You Able to Lock a Nest Thermostat?
If you’re having a battle over the thermostat in your home between people who like things hot and others who prefer them cold, Nest offers a handy feature that keeps things simple.
Nest has a locking feature that allows a user to prevent others from adjusting the settings or changing the temperature outside of a preset range. This doesn’t lock in a specific temperature—a locked Nest continues to use existing program settings—but simply prevents people from changing the settings.
To lock a Nest:
- Press the Settings icon, scroll to the bottom and find Lock.
- Enter a 4-digit pin number you can remember, and do so twice.
- To lock your Nest in Heat or Cool mode, select your maximum and minimum temperature range before tapping Lock at the bottom of the screen.
To unlock a Nest, open the settings and choose Unlock. As soon as you've provided your 4-digit pin, your device will be unlocked.
8. How to Control a Nest Thermostat from Your Phone
You can control the Nest through your Google Home app, which is accessible on your phone or desktop computer. Other versions of Nest, including the Nest Thermostat E and Nest Learning Thermostat, are also compatible with remote control via the Nest app.
Before you can make adjustments for a Nest on your phone with Google Home or the Nest app, you need to follow a few steps:
- Download the Google Home app or, if you have an advanced model, the Nest app to your phone.
- Hook up your Nest Thermostat.
- Access the Google Home app on your phone and complete the setup process, link to your new device and connect to Wi-Fi.
- There is a guided setup tool on Google, if you prefer additional assistance in connecting.
After you've added the Nest to your Home app, you can access it by clicking Thermostat on the home screen. Once you do that, making adjustments is done by dragging your finger along the screen or tapping on a plus or minus sign.
The preset temperatures on your Nest can also be changed from the app. From the home screen, choose Thermostat before selecting Settings. Once there, press Temperature Preferences and then Temperature Presets. The display will show your preferred Comfort, Eco and Sleep temperatures. Choose the appropriate setting to change the temperature for that preset.
9. Creating a Nest Thermostat Schedule
A Nest allows you to set temperatures schedules either on the device or on the Google Home app. Newer and advanced models of the Nest, such as the Nest Thermostat E and Nest Learning Thermostat, are also controllable with the Nest app.
The two easiest ways to schedule your Nest are:
- Quick Schedule: A Quick Schedule will be based on the national average schedule for more energy-efficient use. As you complete your Nest's setup process, the Google Home app enables you to set the temperature with a schedule. If you select this feature, it will show a preset schedule and allows you to make changes. After you've made all your choices, that’s the schedule it uses.
- Temperature Presets: To change the temperature presets on your Nest, open the Google Home app and select Thermostat. Then, tap Presets and choose Edit. After the changes are complete, select Done.
To make tweaks or changes to your current schedule, open the Google Home app, select Thermostat and then tap on Schedules. Find the time of week you want to add a temperature to. Once you pick the day, tap Add and find the preset you want. Finally, select Time before touching and dragging the numbers to change the time. The changes won't save unless you select Done.
10. Setting a Temperature Range on a Nest Thermostat
You can set a temperature range on a Nest Thermostat in the Eco mode. This is a function that adjusts the temperature in your home depending on if anyone is in the residence or if it is empty.
To access Eco mode for customized temperature ranges, go to Settings and select Eco. The thermostat's display should list existing “Heat to” and “Cool to” temperature settings. You can select each and make your preferred changes. When complete, select Done.
11. What to Do if a Nest Thermostat Is Not Compatible
A Nest Thermostat is compatible with most heating and cooling systems. The maker of Nest, Google, features a compatibility checking tool that shares questions concerning your location and existing setup to see which Nest model is compatible with your system.
If you have a Nest and believe it’s not compatible with your system, you should get in touch with local pros for smart thermostat installation in Reinholds. Technicians with the proper experience can assess your system and, if your Nest is compatible, get it installed and on the road to saving you money in no time.
12. Can I Manually Control My Nest Thermostat?
Nest Thermostats are packed with features designed to make life more comfortable and save money. However, you have the ability to turn off the smart features if you prefer to control your Nest like it's a normal thermostat.
Don't forget, by doing this you clear all your temperature schedules and letting the Nest work like any other thermostat—it will display the temperature and let you change the temperature, but that’s about it.
You can achieve this by disabling the settings in a series of steps:
- Auto-Schedule: From the main screen, go to Settings and then scroll to Nest Sense. Go to Auto-Schedule, select No and click Done.
- Eco: From the main screen, go to Settings, scroll to Eco. Once in Eco, select Off for both the Heat to and Cool to temperatures, before selecting Done.
- Home/Away Assist: From the main screen, go to Settings and select Home/Away Assist. Then, select Stop Using and click Done.
- Reset: After you've cleared the settings, reset your nest. From the main screen, go to Settings and select Reset, highlight Schedule and then select Reset to clear out any saved scheduling data.